Дистанционно физиологично наблюдение в реално време
Извършвайте дистанционно физиологично наблюдение на пациента в реално време по време на видео консултация
Моля, обърнете внимание, че тази функционалност в момента е във фаза на пилотно тестване.
По време на консултация с видеообаждане вие имате възможността да наблюдавате пациента си дистанционно от неговото устройство за наблюдение с Bluetooth, например пулсов оксиметър. След като инструктирате пациента си да свърже своето устройство за наблюдение към видеообаждането, вие ще видите резултатите на живо в екрана за видеоповикване и можете да направите екранна снимка и да експортирате данните за записите на пациента, ако желаете. Някои устройства (но не всички) имат способността да записват исторически данни и това също може да бъде достъпно дистанционно, ако е необходимо. Ако тази функционалност не е налична на устройството на пациента, бутонът за достъп до хронологията няма да се покаже.

Обща информация за доставчиците на здравни услуги
За персонала, изпращащ информацията за час до пациентите
Персоналът, изпращащ информацията за час до пациенти, които ще свързват устройство за наблюдение по време на тяхното видеообаждане, може да използва следните препоръки, когато изпраща връзката към клиниката и поддържаща информация. Тези препоръки показват как да изпращате връзки към пациенти, използващи iPhone/iPad (връзка към браузъра Bluefy) или устройства с Android (Google Chrome или Microsoft Edge), за да сте сигурни, че пациентът използва съвместим браузър за разговора.
Инструкции за потребители на iPhone и iPad (iOS):Когато изпращате връзката към клиниката на пациентите, имайте предвид, че някои ще присъстват на прегледа си с помощта на iOS устройство. Те ще се нуждаят от специална връзка, за да присъстват, която ще подкани браузъра Bluefy да се отвори. Това е лесно за създаване и след това можете да добавите към поканата си с ясни инструкции за пациента.
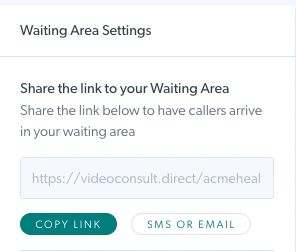
Връзката към вашата клиника може да бъде копирана или можете да изпратите директно от платформата, като използвате SMS или имейл. |
 |
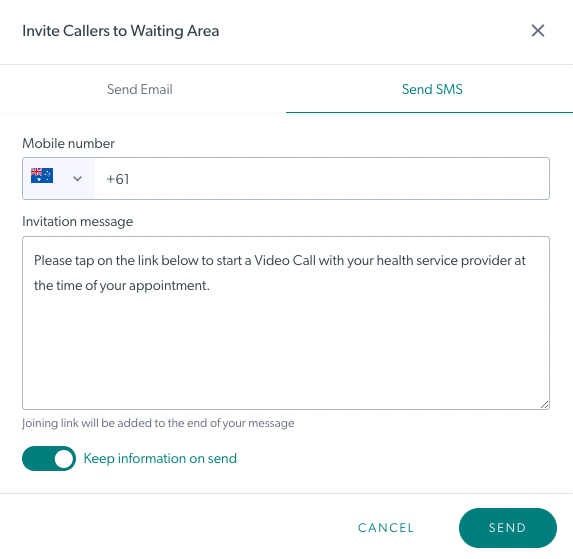
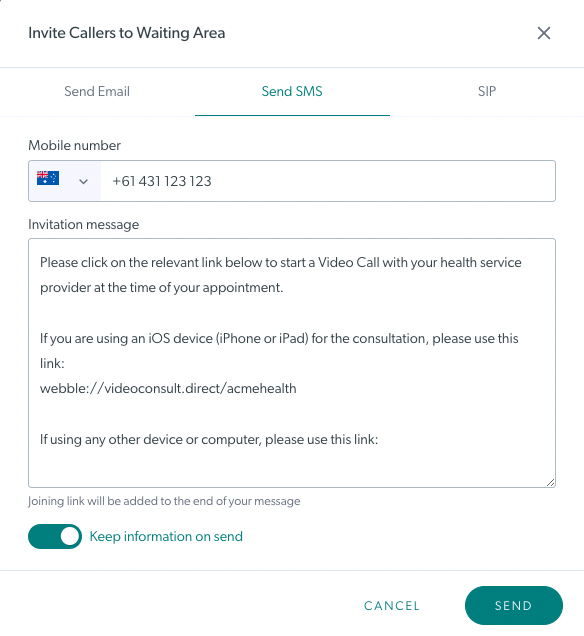
| SMS или имейл Когато използвате тази опция, връзката към клиниката се добавя автоматично в долната част на SMS или имейл. Това изображение показва текста по подразбиране за покани (който може да се редактира, за да отговаря на нуждите на клиниката). |
 |
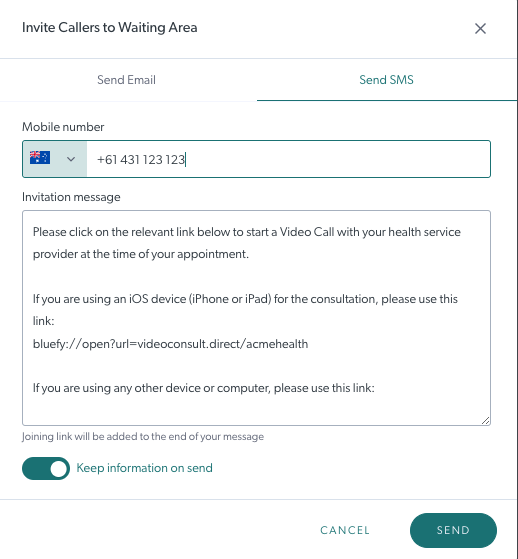
| Можете да покриете всички опции на устройството, като редактирате текста по подразбиране и добавите конкретната връзка за потребителите на iPhone/iPad . Този пример показва предложения текст за срещи за дистанционно наблюдение на пациенти, включително връзка към браузъра Bluefy за тази клиника. Браузърът Bluefy позволява на устройството за наблюдение на пациента да се свърже с разговора чрез Bluetooth. Пациентът ще трябва да инсталира и използва безплатното приложение за браузър Bluefy на своето устройство. За да създадете връзката Bluefy, копирайте вашата обичайна връзка към клиниката и заменете 'https://' с ' bluefy://open?url= '. Обърнете внимание, че тук избрах опцията за SMS, тъй като това означава, че посещението на срещата е просто кликване върху техния iPhone или iPad. |
 |
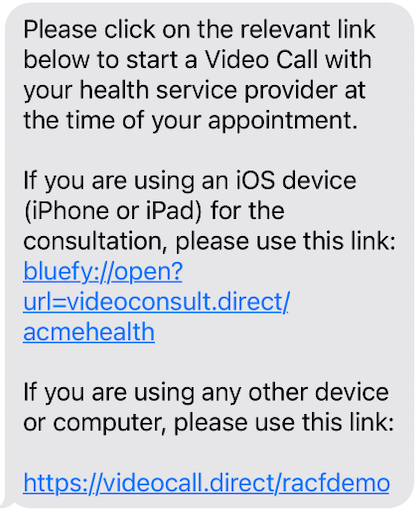
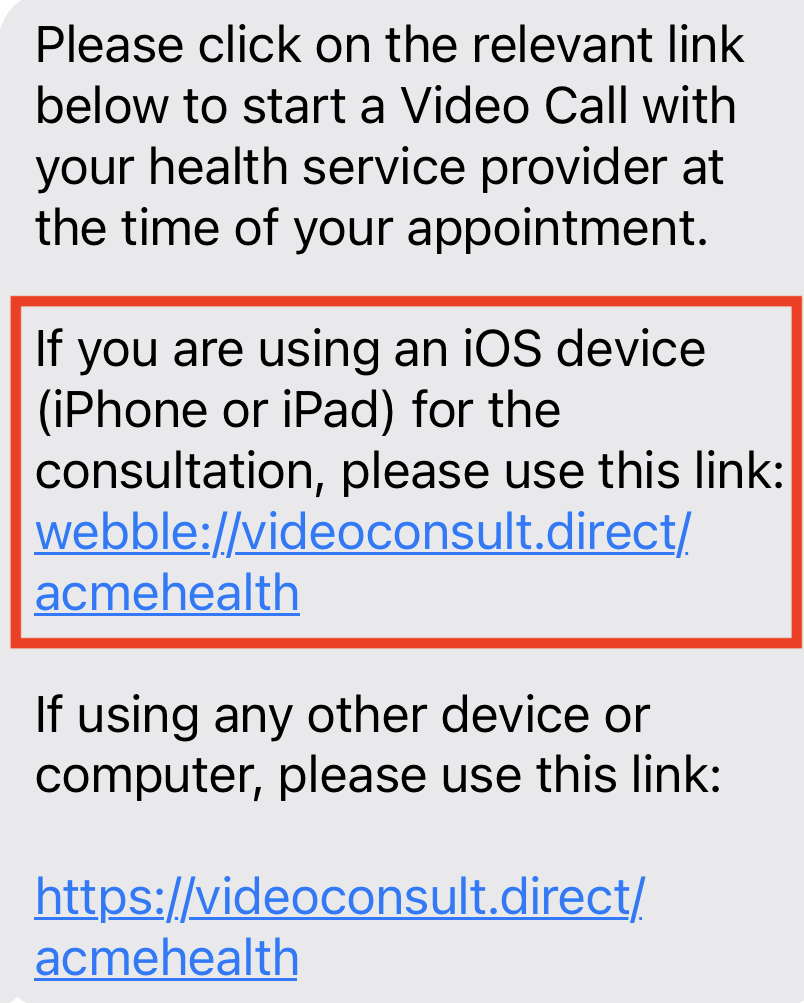
Обичайната връзка към клиниката ще се появи в долната част на получената покана. Пример Bluefy информация и връзка са показани в този пример. След това пациентите могат да кликнат върху съответната връзка, която отговаря на тяхното устройство. Това премахва необходимостта от копиране и поставяне на връзката в браузъра Bluefy на iPhone или iPad, което някои пациенти може да сметнат за предизвикателство. |
 |
| Някои пациенти може да предпочетат да използват браузъра WebBLE на своя iPhone или iPad - въпреки това Bluefy осигурява по-добро потребителско изживяване и е безплатен за изтегляне. Този пример показва предложения текст за срещи за дистанционно наблюдение на пациенти, ако е необходима връзката към клиниката WebBLE. За да създадете връзката WebBLE, копирайте обичайната връзка към клиниката и заменете „https“ с „webble“. Обърнете внимание, че тук избрах опцията за SMS, тъй като това означава, че посещението на срещата е просто щракване на техния смартфон. Моля, обърнете внимание: пациентът ще трябва да инсталира и използва браузъра WebBLE на своето устройство. Това приложение струва $2,99. |
Предложен текст във функцията за изпращане на SMS
Пример за SMS, получен от пациента
|
Инструкции за потребители на Android: Когато изпращате връзката към клиниката на пациентите, имайте предвид, че някои ще присъстват на прегледа си с помощта на устройство с Android. Те ще трябва да използват браузъра Google Chrome или Microsoft Edge, за да присъстват на срещата си - така че можете да ги уведомите за това, когато изпратите информацията за среща. |
 |
| SMS или имейл Когато използвате тази опция, връзката към клиниката се добавя автоматично в долната част на SMS или имейл. Това изображение показва текста по подразбиране за покани, който можете да редактирате, за да дадете по-конкретни инструкции, ако желаете. |
 |
За клиницисти: Инструкции за физиологично наблюдение в реално време
Вижте простите стъпки по-долу, за да инструктирате пациента си да включи и свърже своето устройство за наблюдение директно към консултацията за видеообаждане.
| Присъединете се към видеообаждането с вашия пациент и му обяснете, че ще му помогнете да свърже своето устройство за наблюдение към повикването, за да можете да наблюдавате резултатите му. Моля, обърнете внимание: Вие и вашият пациент трябва да използвате или браузъра Google Chrome или Microsoft Edge, или браузъра WebBLE, ако използвате iPhone или iPad (вижте инструкциите за WebBLE в отделно падащо меню на тази страница). |
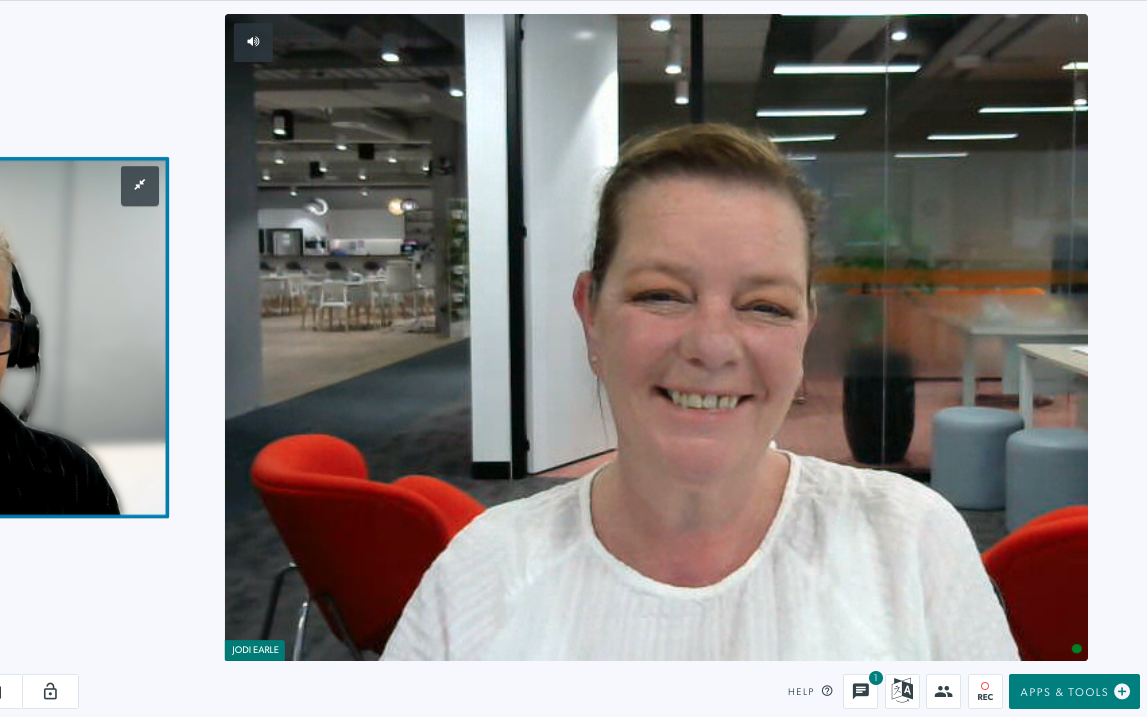 |
| Щракнете върху Приложения и инструменти и след това изберете Устройство за наблюдение на пациента . | 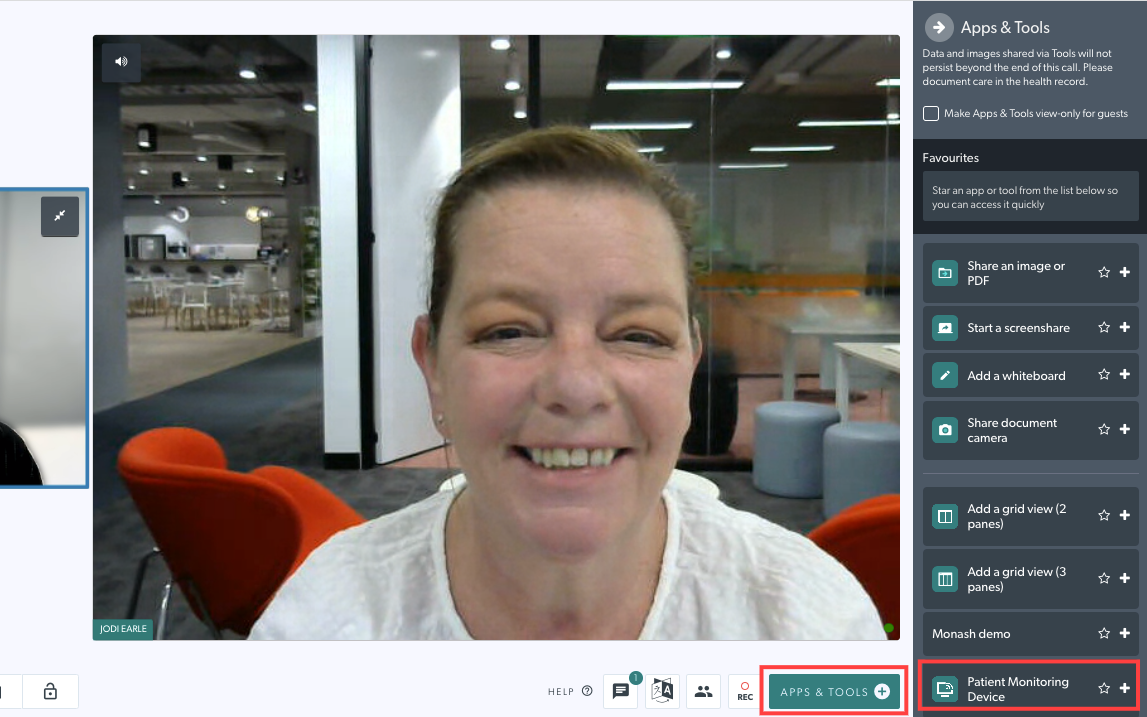 |
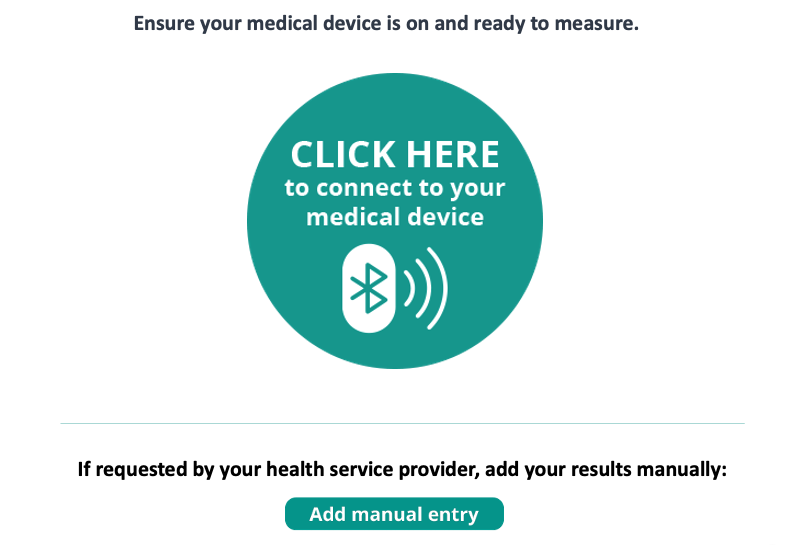
| Ще видите представяне на екрана, представен на вашия пациент. Моля, обърнете внимание: това е за ваша информация и не можете да взаимодействате с бутоните на този екран. Помолете пациента си да включи своето устройство за наблюдение и да го постави на пръста си. След това инструктирайте пациента си да щракне върху Click Here, за да се свърже с вашето медицинско устройство. |
 |
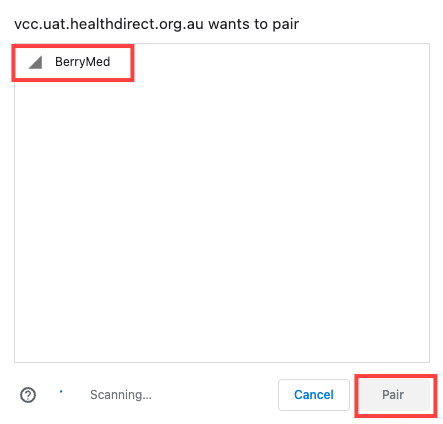
| Вашият пациент ще види изскачащ прозорец на браузъра, който се появява на екрана му, което му позволява да избере устройството си и след това да щракне върху Сдвояване. Това ще свърже тяхното устройство за наблюдение към видеообаждането чрез Bluetooth. Моля, обърнете внимание: това е изгледът от страната на пациента. |
 |
| След няколко минути ще видите резултатите, споделени в Call Screen. Резултатите са на живо и ще се актуализират, докато пациентът държи устройството на пръста си. | 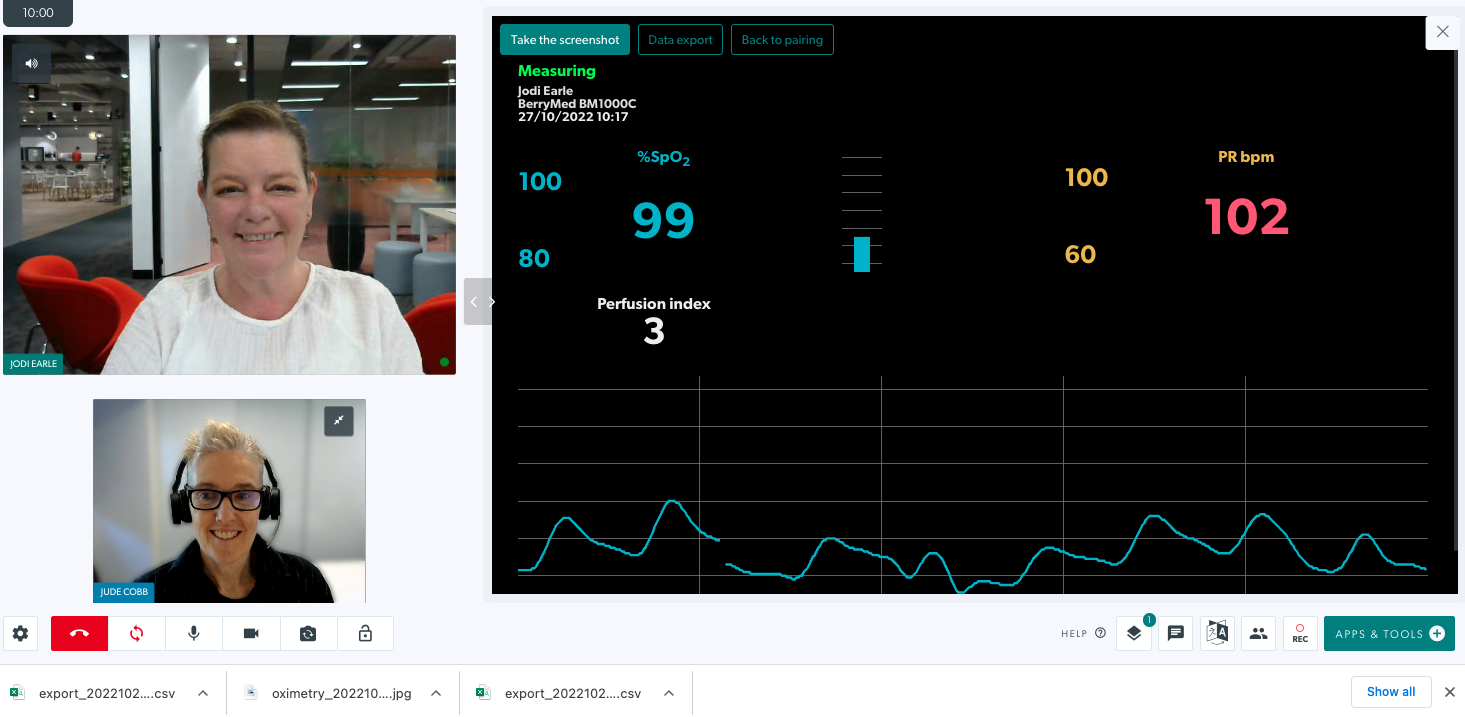 |
Информация и инструкции, специфични за видовете устройства за наблюдение
Моля, щракнете върху връзките по-долу за информация относно това как да използвате приложението Patient Monitoring Device за свързване на Bluetooth медицинско устройство на пациент по време на консултация с видеообаждане, както и информация относно браузърите и ръчното въвеждане на резултати. Тези връзки съдържат информация за лекари и пациенти, специфична за типа устройство, включително видеоклипове и ръководства за бърза справка:
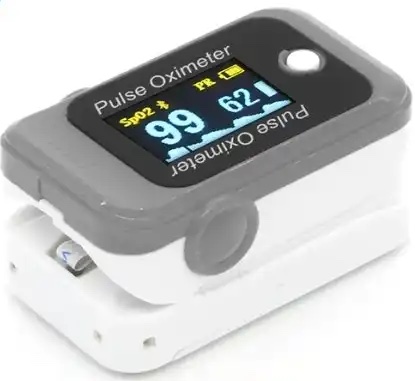 |
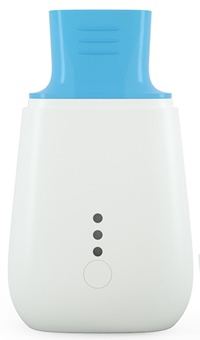
Дистанционно наблюдение на пациента с пулсоксиметри |
 |
Дистанционно наблюдение на пациенти с ЕКГ апарати |
 |
Дистанционно наблюдение на пациенти със спирометрични апарати |
Информация за пациентите
Интегриране на други медицински изделия
За да видите други съвместими медицински устройства, като камери за общи прегледи, обхвати и очила за зрение, моля, посетете тази страница . Ако искате да обсъдите възможността за физиологично наблюдение в реално време, включително интегриране на други устройства, или искате повече информация, моля, свържете се с:
- Сам Джорджи, директор на услугата за видео разговори: sam.georgy@healthdirect.org.au