Healthdirect Australia Help Center

    The Video Call consultation screen and controls

    How to navigate the call screen to get the most out of your Video Call consultation

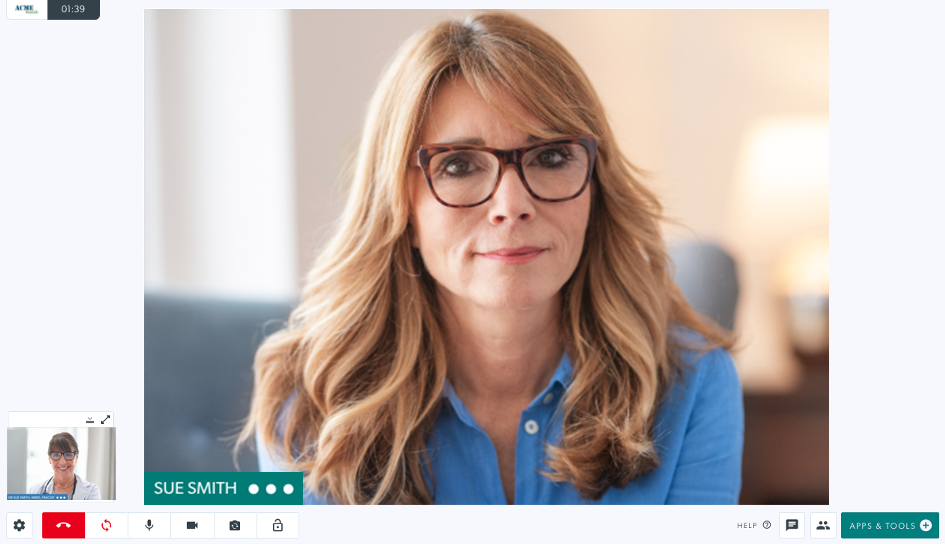
    When you join a Video Call, the Video Call Screen opens in a new browser window and shows all participants in the call as well as the various screen controls and functionality options. Please see the information below for a detailed look at the call screen and the functionality available during a call.

    Video Call Screen layout options

    While in a call, you will see all participants in their own window - you can have up to 6 people in a single Video Call joined from the Waiting Area.
    By default, when you first join a call with a patient or client, you will appear in the smaller screen and they will appear in a larger screen to the right.

    The are a few options for the call screen windows:

    • The main default view with your video feed on the right, as shown in the top image to the right. In calls with multiple participants the individual video screens will arrange themselves to optimally fit the screen.
    • You can minimise your video as outlined below, using the minimise button when you hover over your video feed (bottom image).
    • Hide your video using the Collapse your video button in your minimised screen (highlighted in red in the bottom example to the right).

    Flip video
    The self-view screen in a Video Call is designed to mirror the image by default. Participants have the capability to flip their video horizontally, if desired. 
    Flipping your local feed can be useful for things such as completing physiotherapy exercises, or having a non-mirrored view of a specialised scope device.
    Flipping your video changes your view of your own video feed, it does not affect what other participants in the call see.
    This image shows a side by side view of a default and a local flipped video feed, after pressing the highlighted flip video button.
    Mute participant
    Health service providers (hosts) joining a call can mute others in the call by hovering over a participant's screen, clicking on the microphone button (mute) and confirming they would like to mute that person. Muted participants will be able to unmute themselves, as required.
    Pin participant/s
    There is also a pin hover icon, giving all participants in a call the capability to pin one or more participants, to make them the main focus for their view. Participants other than the host will only have the pin functionality available to them.
    Full screen functionality - other participants in the call
    To view a participant in a Video Call full-screen, hover over their video feed and click on the full-screen button, highlighted in this example.
    This allows you to focus on a particular person in the call by making them full-screen for your view. To exit full-screen mode, hover over the participant and click the full screen button again, or press Esc on your keyboard.
    Please note: This functionality is not yet available on mobile devices.
    These are the hover buttons when you hover over another participant
    Full screen functionality for your local video feed
    Users also have the ability to make their local video feed full-screen during a call. This is useful when switching to another camera such as a back camera or medical scope, allowing the user to view and control the video more precisely. 
    This example shows the hover buttons available when you hover over your own camera view, with the full-screen button highlighted.
    These hover buttons display when you hover over your won video feed
    Minimise your self view
    All users in a Video Call have the option to minimise their video feed or collapse it completely so they can focus on the other participant/s. Hover over your video fed and click on the minimise icon (two inward facing arrows).
    This can be useful to focus on your patient or client rather than self monitoring your own video, which some people may find distracting or tiring. If you minimise or collapse your screen, you can expand it at any time using the outward facing arrows.

    Improved mobile video layout in a multi-party call

    On mobile devices, depending on the number of participants and the size of the screen, active speakers will be displayed, while others may be merged and not visible. As participants speak, the focus will switch to maintain a better user experience on mobile screens. 

    This example shows active participants in a Video Call on a mobile device and an indication of how many other merged participants are in the call.
    Please note: pinned participant video feeds will show in the call and will not be hidden, even if they are not currently speaking.
    Delete

    Call Screen control buttons and features

    Along the bottom of the call screen you will see various call control buttons.

    LHS:

    • Settings 
    • Hang up
    • Refresh 
    • Microphone
    • Camera
    • Switch camera
    • Lock (if enabled in the clinic by the clinic admin)
    • Raise Hand
    RHS:
    • Help
    • Chat
    • Live Captions
    • Call Manager
    • Apps & Tools

    Please see below for details on each of these controls and their functionality.

    Settings 

    Clicking on the settings icon opens up Device, Video Quality, Layout, Language and Advanced options.

    Device Settings:

    Click to change the settings for your device. Select your preferred option from the dropdown menus:

    • Select camera 

    Please note: You can switch camera using the keyboard shortcut Alt-N

    • Select microphone
    • Select speaker
    • Select video quality 
      • Choose from the available video quality options, including low quality for low bandwidth areas and Full HD for high bandwidth areas.
      • In most cases, setting to Adaptive will be the best option.
    • Please note, the video quality you select will persist for future call but you can change this at any time during a call.


    Find out more about Changing Your Video Quality Settings in a Call.


    Select camera
    Select microphone
    Select speaker
    Select video quality
    Language settings
    Select layout

    Select Background

    • There are set blur and virtual backgrounds available, as well as the option to upload a custom virtual background (by clicking the camera icon). Click here for more information.
    Language Settings

    Select your preferred language from the drop-down options. This changes the call controls within your current call and all future calls to your selected language preference. This setting can be changed at any time.

    Advanced Options 
    Click on Change Audio Behaviours to access noise suppression settings. Click on noise suppression to toggle on and off (on displays a green tick). Having noise suppression on helps the quality of the call by cancelling background sounds.
    There is generally no requirement to touch this setting and it is configured to be 'On' for all calls by default. Please note: When toggled off, users can make repetitive sounds without the system dampening or cancelling the noise out. This is useful, for example, when conducting speech pathology consultations where the patient or clinician needs to make repetitive noises other than normal speech.
    For calls with more than four participants, under Advanced options you will see a slider to select max video feeds (top image).
    The slider allows participants to select the maximum number of participants they will see in the call, while others will be merged into one video tile showing how many others are in the call. This can help participants to reduce distractions in a call, or tailor the viewing experience to suit a smaller screen.
    The bottom image shows a call with 5 participants, with 3 visible and 2 others in the call merged into one video tile.

    This example shows 3 visible participants feeds and a tile showing there are two others in the call.

    Hang up
    Click to either Leave the Call or End the Call: 

    • Leave call: when in a call with one other participant it puts that participant on hold in the waiting area. If in a call with more than one other participant, when you leave the call will continue for the other participants.
    • End call: ends the call for all participants.

    Hang up options during a call
    Refresh
    If your connection drops out, or the video freezes for a prolonged period, click the Refresh button to re-establish connection with all callers.
    Microphone
    Click on the microphone icon to mute and unmute yourself in the call, if required.
    Unmute Tooltip
    If you are talking and your microphone is muted, the system detects this and a tooltip displays, reminding you to unmute your microphone.

    Camera
    Click on the camera icon to turn your camera off and on during the call, as required.
    Switch Camera
    Click to switch your camera if you have more than one available.
    You can also use the keyboard shortcut Alt-N (Option-N on a Mac) to switch camera.
    Lock Call
    If enabled by the clinic admin in the clinic, click on the Lock icon to lock the call so other clinic team members cannot click on the Join button in the waiting area.
    To find out more about locking and unlocking calls, click here.
    Raise Hand
    To let others in the call know you would like to speak, you can click the hand icon in the bottom left control buttons to raise your hand. The icon will turn red and a yellow hand will appear in your video feed. It will also appear next to your name in your video feed for improved visibility.
    When you start speaking, your hand will be automatically lowered. If you need to lower your own hand, click the hand icon again.
    Raise Hand icon
    The icon goes red when your hand is raised
    Yellow hand appears at top left in the video feed and next to the participant's when their hand is raised.
    Raise Hand - info for hosts
    As well as seeing the hand raised in the call screen, a notification displays for a few seconds at the bottom of the call screen when someone raises their hand.
    Additionally, in Call Manager > Current Participants, raised hands will show next the the relevant participant name.
    Call Manager for host, showing the raised hand for Sue Smith and the option to lower the hand
    Apps & Tools
    Share resources into your Video Call to enhance your consultation.
    For detailed information on Apps & Tools, refer to the Apps & Tools page

    Chat
    Click on the chat icon to send messages within the call. All participants can see and type chat messages and there is an option to download the messages as a text file for your records.

    To send a chat message:
     

    Click on the chat icon to open the chat drawer, type a message and press Enter to send the message.


    To download the chat messages:

    Click on Download chat at the bottom of the chat window before the call ends. This will download as a text file and can be added to the patient's record, if desired.


    Chat - typing indicator
    There is a new indication message that displays when a Video Call participant is typing in the chat window. This improves the chat functionality for all participants in a call, alerting them that a question or comment is being typed.

    Call Manager
    The Call Manager enables you to:

    • invite participants into the current call via email or SMS
    • transfer the current call to another Waiting Area
    • remove individual participants from the current call, if required. 

    For detailed information about the Call Manager, please click here.

    Delete

    Call screen hover buttons for participants

    There are various hover control buttons for participant video feeds in a call. The hover buttons for your local video feed are different to those available for the hover buttons you see for other participants in the call. See below for more information.

    Local video feed hover buttons

    These hover buttons display for the users own video feed:

    Pin
    Pin your own video feed to see your camera feed as the main video for your view. Hover again and click the pin icon (which will now have a line through it) again to un-pin yourself.
    Full-screen
    Click the full-screen button to view your local video feed full-screen during a call. This is useful when switching to another camera such as a back camera or medical scope, allowing you to view and control the video more precisely (especially on a device with a small screen). 
    Minimise your self view
    All users in a Video Call have the option to minimise their video feed or collapse it completely so they can focus on the other participant/s. Hover over your video fed and click on the minimise icon (two inward facing arrows).
    Flip your video
    The self-view screen in a Video Call is designed to mirror the image by default. Participants have the capability to flip their video horizontally, if desired. 
    Flipping your local feed can be useful for things such as completing physiotherapy exercises, or having a non-mirrored view of a specialised scope device.
    Flipping your video changes your view of your own video feed, it does not affect what other participants in the call see.

    Hover buttons for other participants in the call

    Pin participant/s
    Use the pin hover icon to pin a participant to focus on them in the call. 
    Mute participant
    Only hosts in the call will see the mute hover icon when they hover over another participant's video feed. Patients and guests will not see this option.
    Click the mute icon to mute the participant in the call - and please note you cannot unmute them, they will need to unmute themselves when required.
    Snapshot
    Use the snapshot icon (camera icon) to take a snapshot of the selected participant's screen. This will download a high resolution image to your device - wherever your downloads are set to save to.

    A patient, for example, can switch to their back camera or focus on a wound or other health issue. The clinician can then take a snapshot and save it to the patient's record.
    Full-screen
    Make a participant full-screen for your view in a call.
    Delete

    Video feed not available indicator

    When a participant's video and/or microphone is unavailable during a call, this will be communicated in a message in their call screen video feed. This will make it clear to all participants in the call what is happening for that participant. 

    If the participant has a profile picture associated with their account, or they have provided a picture when they enter a Video Call room, this will show as the image in their video feed when their camera is unavailable. If they have no profile picture, their participant colour and initials will show in their video feed. An icon reflecting their camera feed state will also display.

    Please see below for examples:

    When a participant turns off their camera, this screenshot shows the message and design of their video feed in the Video Call Screen. 
    Please note: this participant does not have a profile picture, hence their initial is showing.
    In this example, the participant has turned off both their camera and microphone.
    In this example, the participant has tabbed away to another screen or application or has answered a phone call while in the Video Call. The participant can still hear you while tabbed away and can be guided to tab back to the browser they are using for the Video Call.
    A pause icon displays and the message in their screen (under their initials) reads: 
    Participant is busy in another application, please wait.
    When the participant has no camera feed available and is speaking, the outer circle around their picture or initials highlights, as shown in this example.
    Delete


    Can’t find what you’re looking for?

    Email support

    or speak to the Video Call team on 1800 580 771

    Internal Content