Far end camera control application
Pan tilt and zoom a compatible participant camera remotely during a Video Call
The Far end camera control application allows participants in a call to remotely control another participant's camera, providing it has Pan Tilt Zoom (PTZ) capability. PTZ cameras can provide a high-quality video feed with enhanced visuals, making it easy for a remote healthcare provider to view and assess a patient's condition remotely. If enabled in the clinic, hosts in the call will see a PTZ app icon in the bottom right controls of the call screen, which they can click to launch the application. They then select the participant in the call whose camera they would like to control and, if the camera has the capability, the selected participant will see a screen where they give consent. The host can then control the selected participant's camera.
Use cases for far end camera control include the ability for a remote specialist to support the assessment of a patient in hospital or in a emergency department. It can also include a GP or specialist assessing a patient who is with a nurse in a remote clinic location with a camera capable of PTZ.
There is also the option to allow another participant to control the host camera and/or their own camera. An example use case for a guest controlling the host camera is a remote specialist invited to the call as a guest - and they need to control the remote camera where the patient is with the host. Allowing them to control their own camera gives them the option to control their PTZ capable camera from their call screen.
Click here to watch the demonstration video (please note this video was recorded before the options to allow guests to control your camera or their own and the voice control function were added).
The far end camera control application needs to be enabled in the clinic by the clinic administrator for the app to be available for clinic members during Video Calls. If not enabled, the PTZ icon will not appear in the call screen.
To ensure your camera is capable of being used with the far end camera control application, please visit this link and test the camera's capabilities. If you find that your camera supports PTZ using the link but does not function within the Video Call application, please contact contact us.
Configuration options for clinic administrators
The Far end camera control application needs to be enabled and some simple configuration options made, before it will be available in the call screen for members of the clinic. The following information outlines the steps for configuring the Far end camera control application:
| To configure the application, Clinic administrators go to Apps in the LHS menu of their clinic - only clinic admins will have access to the Apps section. | 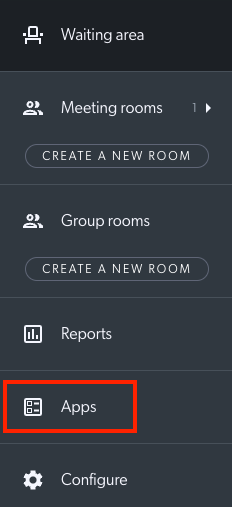 |
| Locate the Far end camera control App and click on the Details cog. | 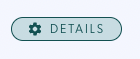 |
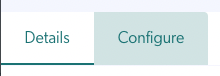
| Select the Configure tab |
|
|
There are some simple configuration options for this application that can be selected and saved:
|
|
|
There are also Pan Tilt and Zoom configuration options to make corrections for specific cameras your clinic will be using. Please note these will apply as defaults in the app for all team members and cameras and can be adjusted in the Call Screen during a Video Call:
|
|
|
Show interactive Tutorial allows a short tutorial to play for health service providers when they first open the application.
Allow Voice Control Allows the option to control the camera with voice controls, such as “2 x right” or "10 x zoom in"
Remember to click Save at the bottom of the Configure tab, to save any changes. |
|


Using the Far end camera control application during a call
Once enabled and configured in the clinic, the application will be available for health service providers (clinic members) in a Video Call consultation. To use the Far end camera control application in the Video Call screen during a call:
Click here to watch the demonstration video.
| The App icon is located in the bottom right control buttons for health service providers when they are in a Video Call. Click on the app icon to launch the application. Only hosts in the call will see this icon to launch the application. |
 |
|
In the participant selection box that appears, select the participant whose camera you want to control.
You can also allow guests to control your camera, if required. |
|
| Once the participant is selected, if Consent is required in the clinic (this is configurable by the clinic admin), the requested participant will get a message to give consent, shown in this example. If Consent is not required, control will be granted immediately without their consent. |
|
| If the selected participant's camera is not PTZ capable, they will see this message. They may not have a PTZ capable camera to switch to, in which case they can let you know and the consultation can continue without PTZ control. |  |
| If the camera is compatible with PTZ, you will now be able to control the camera. You will see a red outline around the controllable camera feed in the call screen, as shown in this example. To see the selected camera feed more clearly, you can minimise your self view and focus on the other participant. In multi-person calls you can pin a participant and control their camera. You can also make a participant full screen to get a detailed view of their screen, if desired. Click here to read more about call screen layout options. |
 |
|
Click and box draw control This control option does not show any overlay controls and you can click near the top and bottom, left and right of the participant video feed to control the pan and tilt of their camera. You can draw a box around an area to zoom in, as shown in this example. The bigger the box the closer the zoom. |
 |
|
PTZ control overlay With this control option, you will see the controls overlaid in the selected participant's camera feed. You can click at the top of this control window (in the grey opaque section) to move it around to the desired location in the call screen. Use the arrows to pan and tilt and drag the zoom control to zoom in and out. |
 |
|
Voice control If enabled in the clinic, there is the option to turn on Voice Control for controlling the camera. Press the mic icon or Shift+V to enable voice control. There is the capability to control speed for zoom and direction, eg you could say 2 times right, 4 times up, 10 x zoom in, etc. You can also say Reset to go to the starting position for the camera and Home to go to the Home position for the camera. |
This image shows the joystick controller with the Voice Control icon highlighted.
|
|
Keyboard shortcuts and mouse scroll controls:
|
 |
|
Settings and control options
|
|
|
Settings Click on the Settings cog and the settings window will display. Here you can make adjustments to the pan and tilt correction settings, if required, and add up to four presets for the camera. To add a preset, pan, tilt and/or zoom to the required view and click the Add button. Give the preset a name and it will appear as a button in the Presets section. This setting will persist for future calls and can be deleted, if required. |
 |


Remotely controlling an iPhone or Android phone camera
For patients who are attending the consultation using their phone, hosts in the call can control the zoom function during the call. Remote Pan and Tilt functionality will not be available on these devices but the patient can move the phone easily to the required position. To control a phone camera remotely:
| The App icon is located in the bottom right control buttons for health service providers when they are in a Video Call. Click on the app icon to launch the application. Only hosts in the call will see this icon, guests and other callers do not have access to control another participant's camera. |
 |
|
In the participant selection box that appears, select the participant whose camera you want to control. In this example the host is in a call with one other person, so only one name is available. If you tick the 'Guest can control camera' checkbox, the selected guest can also control the camera in their video feed using the controls.
|
 |
| Once the participant is selected, if Consent is required in the clinic (this is configurable by the clinic admin), the requested person will get a message to confirm consent, shown in this example. If Consent is not required, control will be granted immediately without their consent. |
 |
|
You will now be able to control the camera. You will see a red outline around the controllable camera feed. For iPhones and Android phones the overlay controls will be the only control option. You cannot pan and tilt but you can use the Zoom slider, the Home button, take a screenshot and Settings, including creating zoom presets.
|
 |
Supported PTZ capable cameras
The list of PTZ capable cameras below have been tested and confirmed as compatible with the Video Call service. There will be other compatible cameras that we have not yet tested, so please use this link to test an available camera that is not in this list. If you find that your camera supports PTZ using the link but does not function within the Video Call application, please contact contact us.
Please note: Each camera will have its own default settings for functions such as zoom, pan and tilt speeds and the home position for the camera. If you notice any settings that are not set appropriately for your requirements, you should be able to access the camera settings and make adjustments before using the camera with the Far end camera control app in Video Call. Please contact the manufacturer if it is not clear how to do this.
|
Aver MD330U 4K PTZ camera with 30X optical zoom lens and AI Noise Reduction. |
 |
|
MD720UIS Medical Grade All-in-One PTZ Medical Camera 4K Ultra HD - excellent resolution 20x optical zoom Voice control Auto IR night view
|
 |
|
Logitech ConferenceCam Connect Portable ConferenceCam with Bluetooth® speakerphone |
 |
|
Logitech Rally PTZ camera with Ultra-HD imaging system and automatic camera control |
 |
|
Minrray UV540 Full HD, Wide View Angle, Multiple Zoom Lens, Multiple Video Interfaces and Multiple protocols |
 |
|
OBSBOT Tiny 2 Lite AI-Powered 4K PTZ Webcam AI Auto Tracking UHD 4K Resolution 1/2” CMOS Sensor 4X Digital Zoom with Auto Zoom Gesture Control 2.0, W Mini Tripod |
|
|
OBSBOT Tiny 2 AI-Powered 4K Webcam
AI Auto tracking with Auto Zoom UHD 4K Resolution Voice Control Dynamic Gesture Control 1/1.5’’ CMOS
|
 |
|
Polycom EagleEye IV USB Camera Full HD (1080P) camera, covering a wide field of view of 72.5˚, with the mechanical pan, tilt, and 12x zoom |
 |
|
Tenveo Tevo-VL20N-NDI Full HD (1080P) 60fps 20x Zoom USB3.0 IP Live Streaming Camera |
 |
|
Yealink UVC84 4K PTZ Camera for medium and large room sizes. |
 |
|
Yealink UVC86 4K Dual-Eye Intelligent Tracking Camera for Medium and Large Rooms |
 |
